LiteSpeed Cache Domain Key

Introduction to LiteSpeed Cache Domain Key
Here you’ll discover the step-by-step process of obtaining your LiteSpeed Cache Domain Key and then linking your domain to Quic.Cloud. This involves the LSCache plugin for WordPress. This article is listed in our “Create Blog Website” main topic. It also is a part of the “Designing & Creating Site” category. Keep reading for the easy steps and tips along the way.
LSCache Plugin Domain Key
You’ll now begin with getting populated the LSCache Plugin Domain Key text box. You can use LiteSpeed Cache for a primary domain or an addon domain. Read our article on “How To Create An Addon Domain in cPanel”.
You only need to already have WordPress installed to being. After that, there are some other prerequisites. Here are the steps to move forward with.
Step 1. Install and Activate the LSCache Plugin for WP.
First, ensure you’ve installed and activated the free LSCache plugin, aka the LiteSpeed Cache Plugin for WordPress. Then, tap its “Settings” option. You can accept the defaults for now (or use your settings if you already have them established).
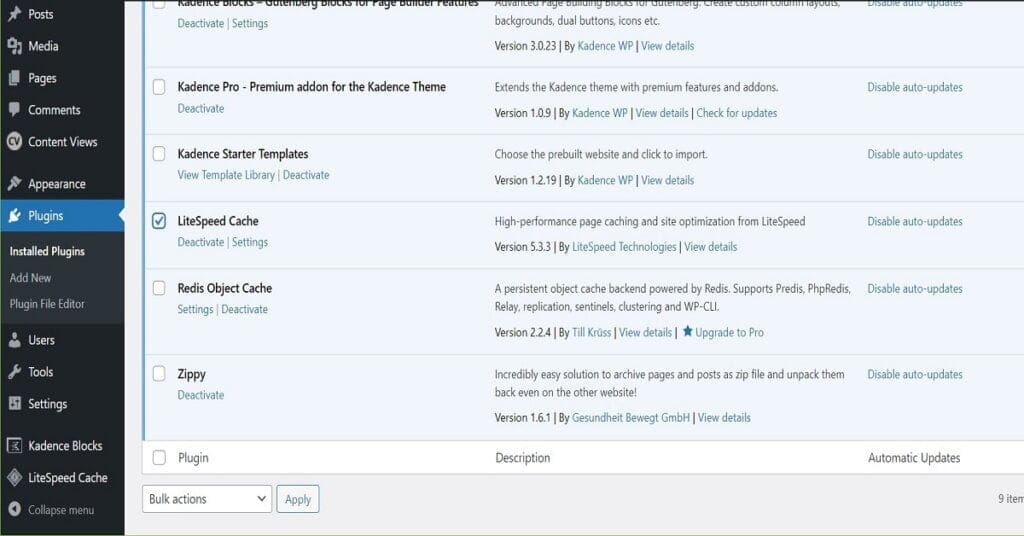
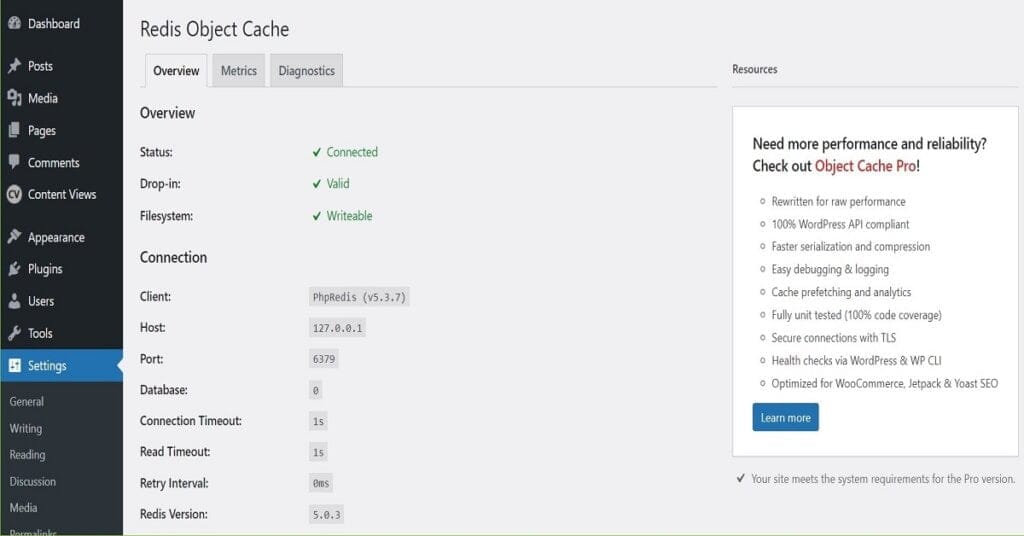
At any point you receive a message indicating a cache service has stopped, e.g., redis or memcache, feel free to go ahead and restart that service. Sometimes changes you’re making required it to be stopped. It’s a good idea to start it up again and keep it actively running when you see those messages.
Also, ensure you have an account (free) setup at Quic.Cloud. If you don’t have one yet, register for one. It’s fine to use your current domain for that initial setup but it’s not required.
Step 2. Go to the LSCache Plugin Domain Key screen.
From the Admin screen, click on menu option: LiteSpeed Cache | General. You should be on a tab named “General Settings”. From here, just tap the button “Request Domain Key”.
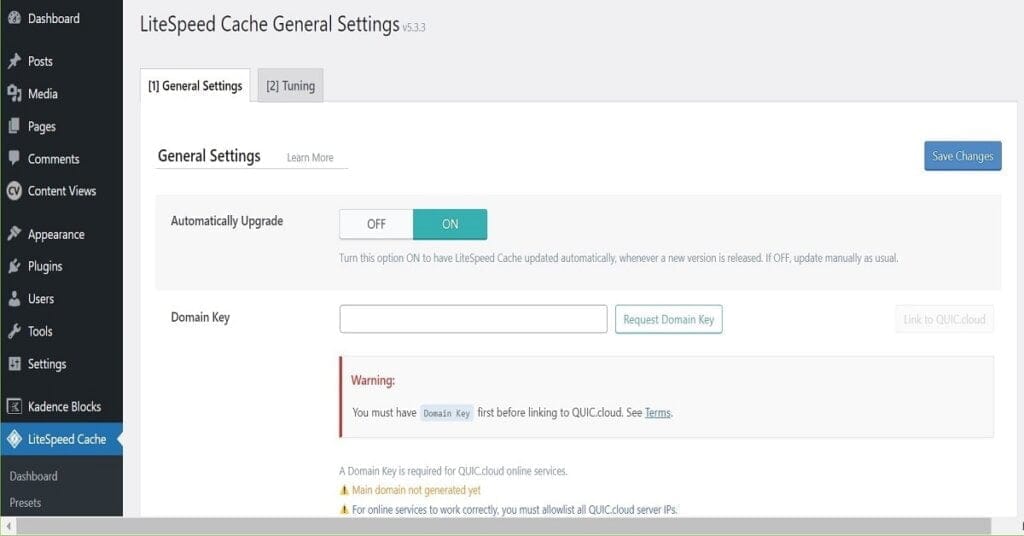
Step 3. See Response and Refresh Screen Periodically
After tapping the “Request Domain Key” button, you’ll see a response on the screen. It should read similar to indicate the request was received. If you received such a response, just refresh your browser screen about every minute or two for the acceptance message. Sometimes it’s fast within 1/2 minute and others it’s as long as about 5 to 10 minutes.
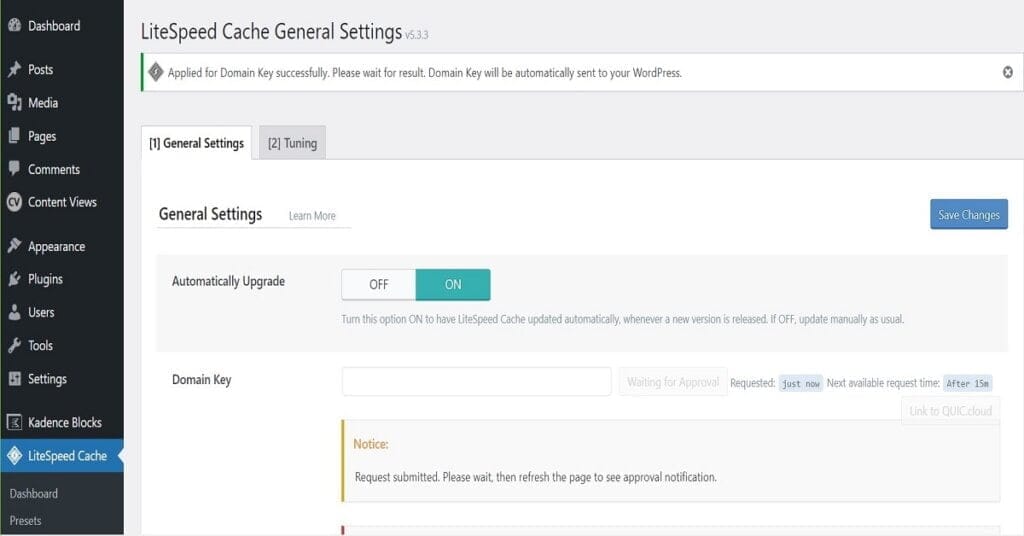
Step 4. Domain Key Acceptance Message is Received
After refreshing the browser screen, the acceptance response message is received. You also might see a message to re-enable your redis or memcache service. But, first you must click to <Save Changes>, which will save your received domain key.
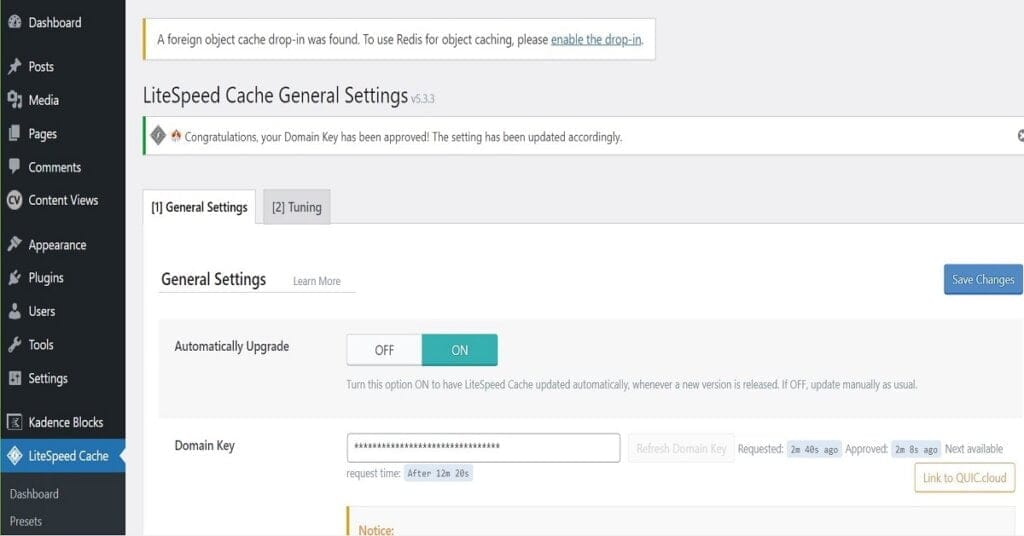
Step 5. Re-enable your Redis or MemCache Service.
After you’ve saved your General Settings screen that contains your now populated domain key, you can switch over to start up your cache service again. Then, return to the General Settings screen to continue.
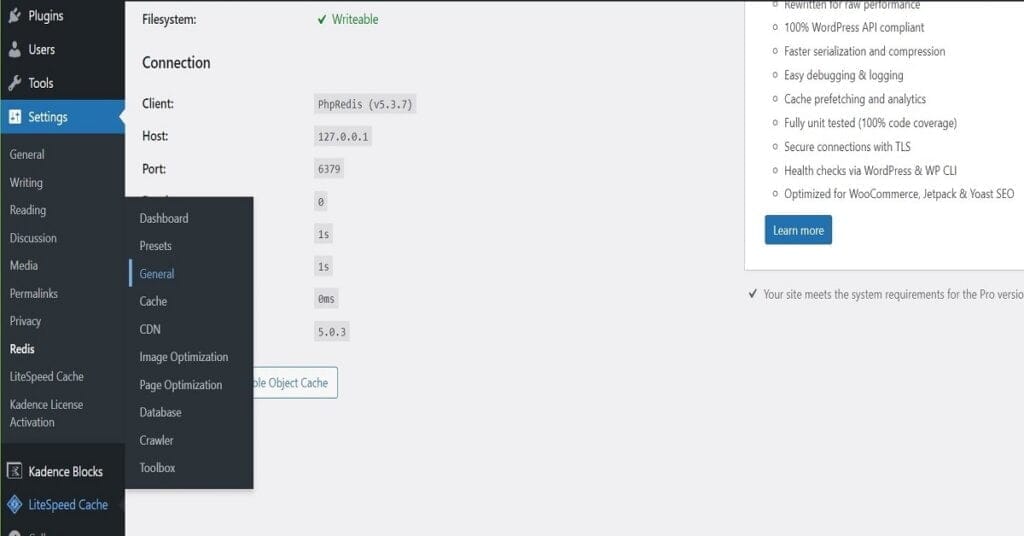
Step 6. Link Domain to QUIC.Cloud
Now that the domain key has been accepted and it populated the text box entry, you’re restarted your cache service (redis or memcache). You’re nearly done. Now, tap the <Link to QUIC.cloud> button to continue closer to the end. Then, respond to the prompt “Yes” and Continue to Submit for completion.
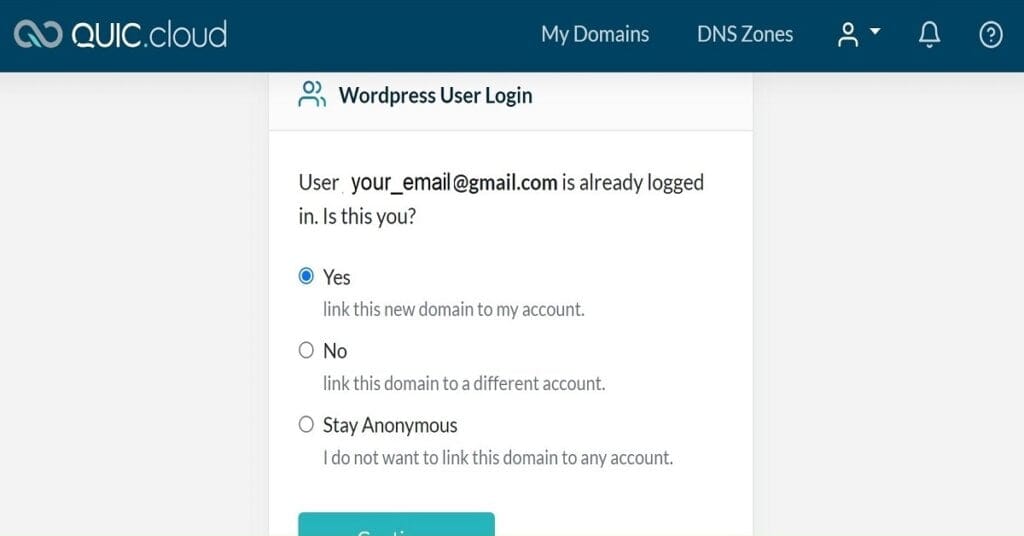
Final Follow-ups to Linking your Domain to QUIC.Cloud
Now that you’ve linked your domain name to QUIC.cloud, you’ll want to ensure your host provider allows all the QUIC.cloud IP addresses shown LiteSpeed Cache | General Settings screen. By allow, I do mean to pass through their firewall for your LiteSpeed cache service. They’re listed in the URL named Current Online Server IPs.
One way is to copy and paste the list into a support ticket but also send the URL, in case they have a way to maintain that list. And, in your request, if you’re not using a shared server, you’ll want to ask them to assign the permissions to the entire server, not just to your domain. That way, if you add other future domains on that server, you won’t have to repeat that support ticket again.
After about an hour or so, you’ll notice the nodes will start to expand and appear on that General Settings screen. If not, you might have to wait until your support ticket has been concluded with the IP address permissions assigned.
Other Related Articles
Here are some other related articles you might find helpful.
Conclusion
So, as I understand it, this LSCache plugin also works for non LiteSpeed servers according to the LiteSpeed FAQ Support section. I run my domains on LiteSpeed Server partner hosts so, I haven’t had any issues and the speed performance has been great. I truly hope you have a good experience on your side of things too. If you haven’t yet, go ahead and configure your plugin with the QUIC.cloud service account. I’ll have more articles on LiteSpeed over time. Let me know your experiences with LiteSpeed; comment now!
