This article is about the best size for WordPress Images to use for regular blogging or food blogging. There are many sizing aspects addressed and there is a lot of controversy on the topic which is also covered in a nominal manner. Also referenced are plugins, optimizing images, and links to top image plugins. This article is listed in our “Write Content” main topic. It also is a part of the “Writing & Publishing Content” category.
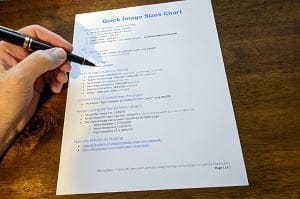
If you just want the quick list of settings, here’s a summary WordPress Blog Image Sizes Quick Chart.
Best WordPress Image Sizes Settings
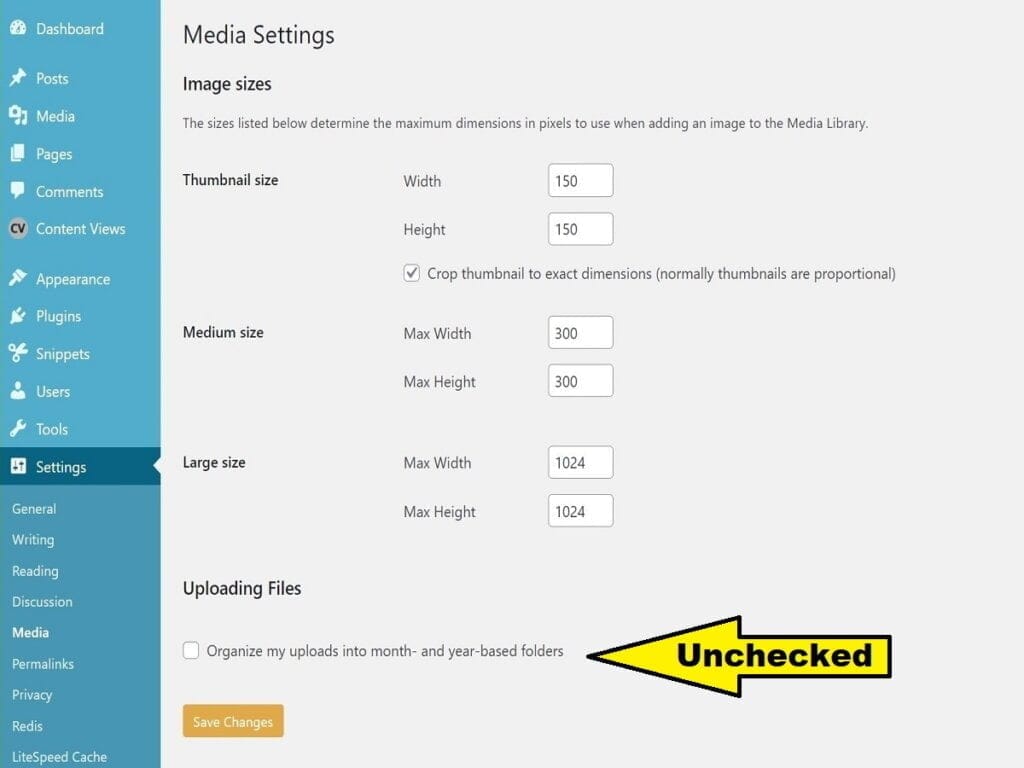
Many experts will make at least one setting change in WordPress Media Sizes Settings. This is located in “WordPress | Settings | Media”. The form title is “Media Settings”. And the checkbox to organize media files by month and year is selected by default after installing WordPress. This checkbox is unchecked to make the change and then the setting is saved. This will ensure that your images (only those uploaded in the future) won’t be all over the place. What happens is, in years to come, image files will be located under year subfolders in month subfolders. Read on to understand further impact and positive gains from this setting change.
In effect, as an SEO benefit, your image files would then have shorter URLs. Also, a technical benefit is that future bugs of media files not being found or able to be deleted permanently will be resolved significantly easier. And a security benefit is that your backups of your site will be less likely to have an issue with an image file not being backed up due to an excessively long file path.
There are no known plugins that will move the image files around in folders and coupled with updating the native WordPress Media Library table records of their physical image file paths. There are, however, plugins that create their own database table(s) and give relative file paths to simulate paths different from the actual physical paths. And some just allow you to assign categories or tags (of their own, not WordPress structure).
I don’t use any such plugins but have tested and had questions answered on some of them to understand what they do in the background. I rely on seeing true physical file paths for images.
The Proper Way to Upload Images in WordPress
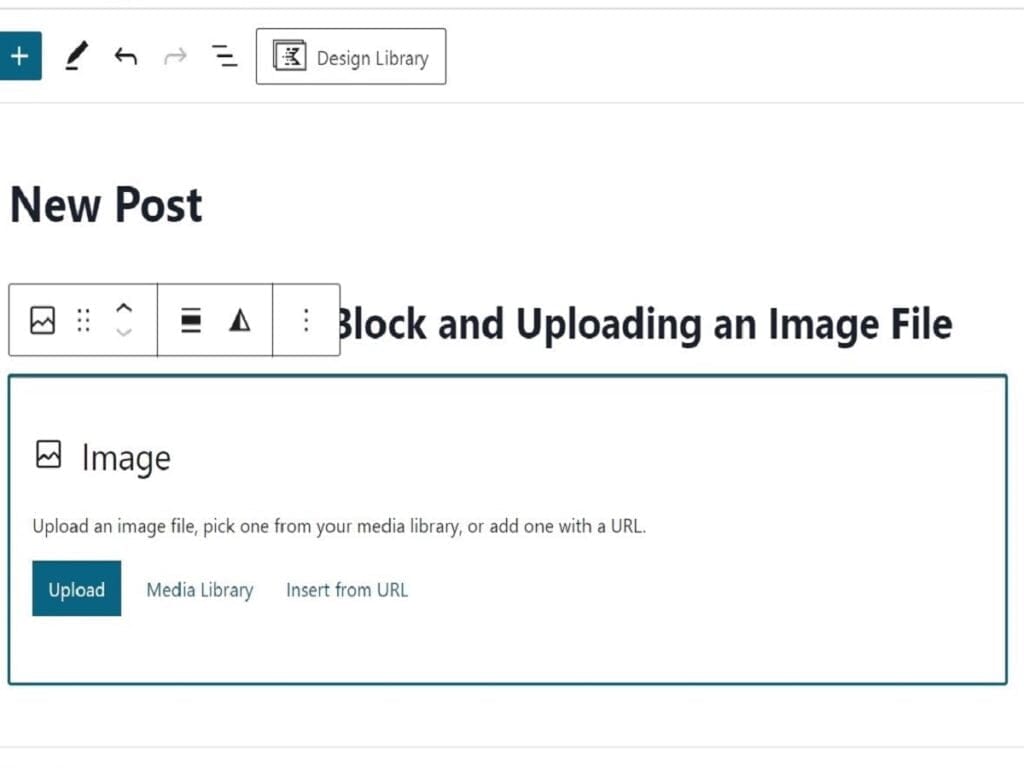
The proper way to upload images in WordPress is to do by using the Media Library interface. That is available directly and indirectly in many ways. One way is via inserting any image type of block. For the most basic example, when you insert a block named “Image”, it will have a method to add it via Media Library and that’s what you should select.
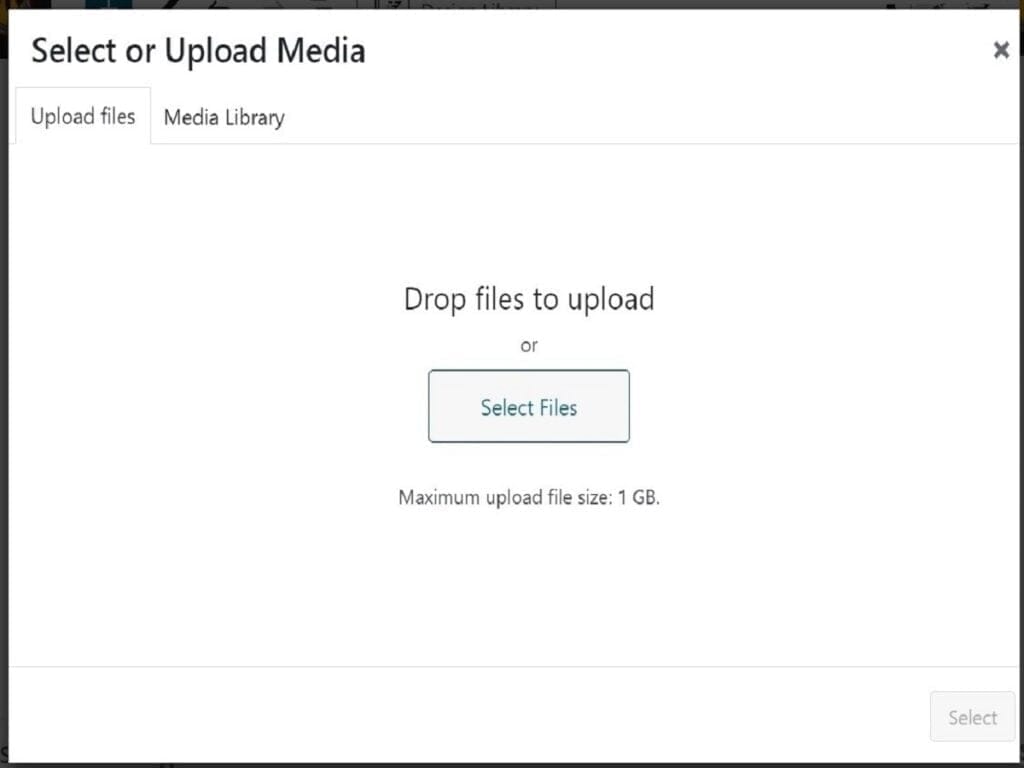
It will open the Media Library interface and you can then either drag an image file onto it or you can manually upload it using that same screen and tapping <Select Files>. If you upload manually, one file at a time, you can change some of the file properties (like caption, alt-text, etc.) after each has uploaded. But that’s only if you need to. You can also go back and open the Media Library and edit each image files properties at any time.
Also, you can use either tab as shown to drag and drop one or more media files for uploading. Just remember to populate the needed identifying properties of each uploaded file. That’s referring to alt+text, title, caption, and description. The alt+text info is extremely important for SEO purposes.
Common Image File Formats in WordPress
The two most used common image file formats in WordPress are JPG and PNG. Specialty image sites like photographers or art might use multiple formats, including retina referenced images and heavy file size images. For being able to have a good balance between optimization and file sizes, the file format type of JPG is the more popularly accepted.
Best WordPress Image Sizes
Here are some various kinds of best WordPress image sizes. They cover sizes of featured images, blog images, full images, banner, logo, and Recipe Maker images for food blogs.
This article is written with the goals of optimum viewing of images along with optimization by performance speed. Because there are countless themes, plugins, caching, and hosted services there is no collective set of best practices in reality where one size fits all. And, all platforms have their own set of “recommended sizes” such as for Facebook, LinkedIn, Pinterest, and so on. And then there are the search engines that have their requirements. It’s literally impossible to satisfy all of them if your post gets shared or shown in searches. The one way would be to upload very high resolution images and have a large variety of resized images to cover all of their “recommended sizes” but, that’s not feasible.
So, many articles cover some of the key image sizes for their industry. Here I cover regular, standard blog articles as well as food blogs for the suggested image sizes. I do not address food blogs that use extremely high resolution photos. For those, I recommend you refer to articles that cover the photographic industry image sizes and they will cover that scenario better than me.
My focus is on great speed performance with good resolution solutions that are stable with low maintenance. So, I use a managed site host that displays their service plans’ specs, a LiteSpeed Server for caching and image performance. And, for International purposes, I also use a CDN that ties in with the LiteSpeed Server system worldwide. And, I use a competitively priced set of services that can scale up or down as needed. So, speed, good resolution, and responsive for images are the primary goals to achieve here. I’ve worked hard in the IT world of management, development, consulting, and foods industry for over 4 decades so, let’s look at sizing specifics next.
Using 16:9 Image Sizes Overall
The popular, modern sizing is the 16:9 format. So, for consistency, here’s a list of sizes you can typically use (that I use) that can handle common breakpoints correctly. It’s also a set of sizes that LiteSpeed CDN and others can typically handle for appropriate and consistent results.
- Full / hero: 1200 × 675 px (including featured images)
- Medium: 1024 × 576 px
- Small: 768 × 432 px
- Thumbnail/card: 480 × 270 px (also good for recipe sizes of instructional steps)
- Tiny/icon: 320 × 180 px
About WordPress Recommended Image Size
WordPress recommended image size is going to vary with each picture’s usage and where it is to be located on the post or page. For example, there’s going to be a featured image in all pages and posts and there will be a defined size for that. But, when it comes to an image you use in between paragraphs, that size will be different. And, if you are going to use 2 images side by side, in a 2 column block, for example, those images can potentially be smaller. But, then again, they don’t have to be a smaller size because they’ll auto adjust to fit. Oh but, then you’re using a larger uploaded pair of images that loads slower and takes up more server space while you’re scaling them down for the page or post. So, what determines the sizes to use for the different uses?
All of these questions of thoughts of what sizes to use boil down to this. The image size is going to be recommended to be around an overall set of dimensions for most devices of today that matches the most popularly used themes of today, as recommended by WordPress. Will they always work with every theme? No but they will with the most popular ones. Will they always scale down to satisfy Google’s PSI analysis? No but they will with the right plugins or host services for caching and image optimizer solutions. Let’s now quickly look at some of the commonly used WordPress image sizes and their uses.
Here’s a Beginner’s Guide to WordPress Image Sizes that is a good article that explains in some detail on how to know when you can use a varying size for differing situations.
WordPress Blog Image Dimensions and Ratio
WordPress Blog Image Dimensions are going to follow the idea of WordPress Article Image Sizes. A generic size of 2000×2000 for the largest sizes is one idea that some use. From there, all other sizes are smaller than that. And, the only time to exceed that, is when you’re using what’s considered a “full screen” image, which is also discussed later so, keep reading.
For ratios, I use the theme (Kadence) to focus on a ratio of 16:9 on pages, posts, and archive layouts, which is the current, most latest image ratio that’s rapidly grown in popularity. It matches modern movie theaters and the most desired computer monitors also used by gamers and media experts. However, there are a lot of reasons that you may choose to go with a 4:3 ratio which used to be a good standard. It’s still used and is acceptable, of course. And 16:9 ratio isn’t usable in all situations but, just so you know, it’s an active trend and it was late coming to the WordPress scene. So, I recommend you consider going that direction when possible. Below are examples of an original image and then it’s scaled using different standard ratios.
So, because of this, you can envision when might happen to an image that is scaled by cropping to force fit a desired layout shape.




Size of Featured Image in WordPress
The suggested size of featured image in WordPress is predominantly 1200×628. I have seen a small amount of articles that have stated 1200×630 and a few more that have said 1200×675. For the most successfully referenced sites respected in various industries, 1200×628 has been settled. However, I focus on the current trending migration to the 16:9 size, which is for wider screens.
WordPress Image Size Full
The largest of all will be the WordPress image size full screen. These full screen images are used for Hero images and for Slideshow images. The concept here is that these images will fill the screen for near or equal to 100% coverage and attention of the reader to acquire an immersive effect. A practical use of this size, when concerned about performance, is when you have it only as a media file in the Media Library, and you put a link to it from a thumbnail or other standard image on the post or page.
Banner Image Size – Header
The banner image size, also known as a header, can be 1048×250. So, whenever an images is used as a header or any type of standard banner, this is the size to use.

Logo Image Sizes
The logo image sizes will vary so, it’s good to have several sizes available for multiples uses. You use a logo image for your site, for each social media site, and so on. Also, themes and some plugins allow for inserting logo images. And, you also should have a logo icon. Here are the possible sizes you can consider. Also, know that the logo sizes will vary quite a bit as some will have a square logo and others might have a banner type of logo. And fortunately, some themes will allow for storing a desktop logo and a mobile logo so it won’t have to scale it, which helps on performance.
- Site icon: 512×512
- Desktop logo (if square): 300×300, 250×250, or 200×200
- Mobile logo (if square): 200×200, 150×150, or 100×100

WordPress Recipe Maker Image Sizes
WordPress Recipe Maker image sizes are for the world’s most popular food blog plugin. There will be some extra image sizes added to WordPress to allow for full functionality of image sizes for recipes. Here are those sizes that are added:
- Wprm-metadata-1_1 (500×500)
- Wprm-metadata-4_3 (500×375)
- Wprm-metadata-16_9 (480×270)



Now, the sizes for specifics can vary. For example, when I communicated with Brecht, the plugin creator, he conveyed that even a 2000×2000 image could technically be used for any original image, as the plugin will create the other sizes automatically anyway, and will use them appropriately. So, after some experimentation, there are some advantages for using some good sized images so a reader can tap on a recipe step’s image, for example, and pinch to zoom in for seeing a detail. And also, without going too large, a nominal size to establish as an acceptable standard that’s still responsive for optimizing works great. Here are those sizes that passed analysis tests and metrics for performance.
- Recipe Main Image Size: 1200×675
- Recipe Instruction Step Image Size: 1200×675
- This scales to existing wprm 16:9 size of 480×270
Social Media Images
While this social media images section continues to expand over time, we will only post highly confirmed sizes.
- Facebook: 1200×628
Optimizing WordPress Images
There are a ton of optimizing WordPress Images plugins, tools, and services. The desired result of optimizing images is to retain a fair amount of resolution while compressing the file size for faster download speeds.
The most recommended method suggested by experts is to optimize your image first on your main computer and then upload it into Media Library. Also, there are some of the popular image plugins that have a degree of optimization after they’re uploaded. And some servers, like for LiteSpeed will further optimize WordPress images.
The big difference to recognize in the optimizing process of WordPress images is if it’s done on your site’s server, on an image storage server, or on the client’s browser. Sometimes, when the image is served from another server and your site is being hosted elsewhere, the delays to combine the two might not save any speed performance. But, if a CDN server is involved, and if it can cache and serve both efficiently, the performance is notably improved. The LiteSpeed Servers do allow for this to occur. See recommended Image related plugins in a later section; keep reading.
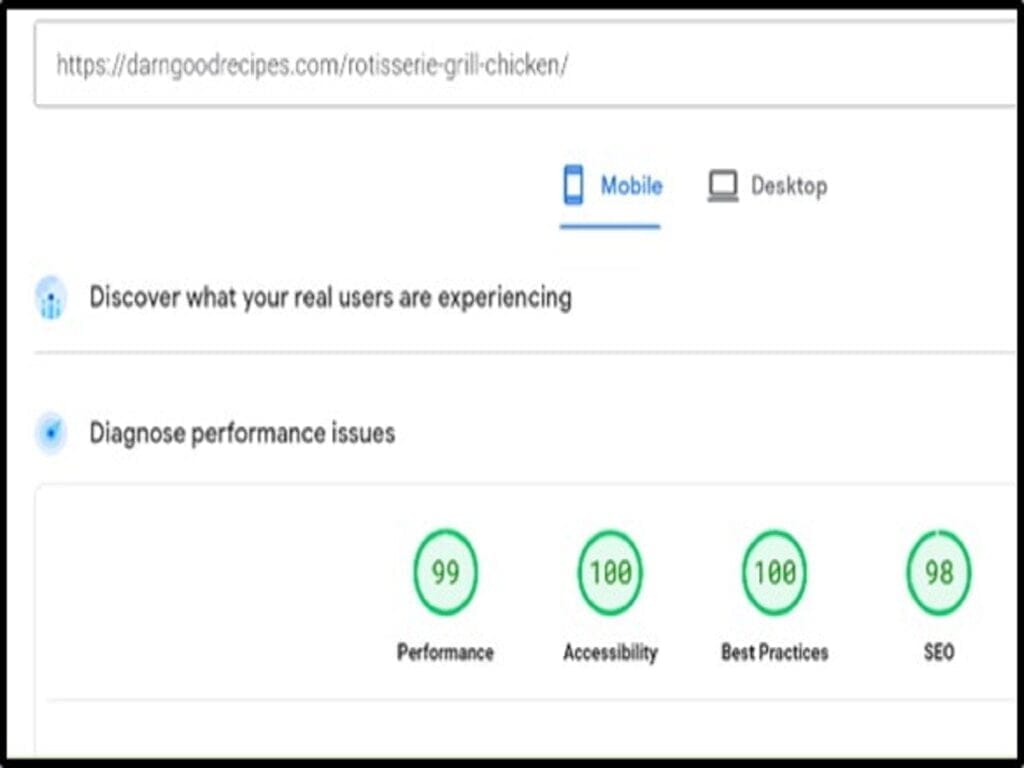
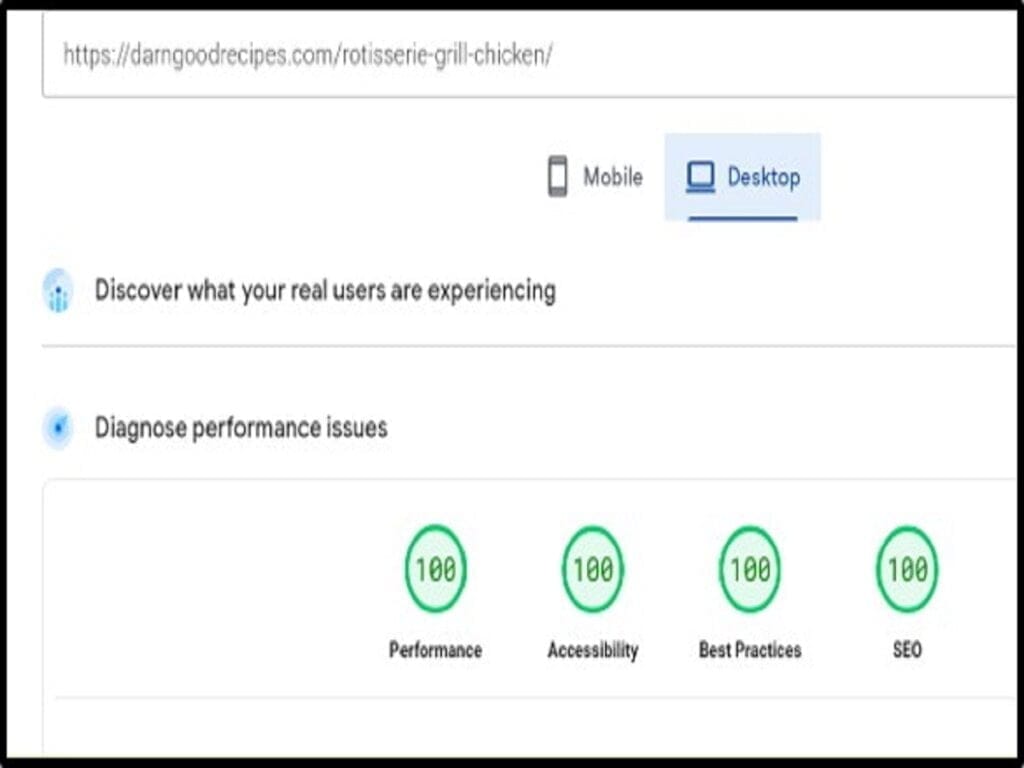
Here is an example of a recipe blog post, using the WP Recipe Maker Plugin, running on LiteSpeed Server at HostArmada.
Optimizing WordPress Images Before Uploading
Optimizing images is necessary for proper website performance and imaging design isn’t the focus. So, optimizing images is accomplished through a balance between sizing and compression. You might also want to include colors, saturation, and so on. However, that’s imaging. You can use any type of tool you choose when resizing or compressing WordPress Images. It’s a better practice if you optimize them to the desired size and compression before uploading them into the WordPress Media Library. Some will use a plugin that optimizes or just resizes it during the uploading process.
There are plenty of tools and apps available everywhere for resizing. When possible, I use basic free accessories that comes with my desktop computer’s operating system. Here’s how I use the desktop accessory apps “Photos” and “Paint” native to Microsoft Windows.
Cropping is Easy with Windows Photos App
I’ll right-click an image and choose “Open with” | “Photos”. Then, I’ll tap the “Edit Image” icon. It changes the interface to reveal cropping options. I’ll crop it reasonably close to both the appearance and the layout size I want, e.g., 16:9 or 4:3. Then, I’ll save it or save a copy. Then, I’ll right-click on the image and select “properties”. I’ll tap to check the Security checkbox named “Unblock”. This Security setting happens after you use “Photos” to edit any image; you change that setting back to “Unblock” to retain full visibility and editing and before uploading.
Resizing Using Windows Paint App
Resizing using Windows Paint app is next. After an image is opened using “Paint”, under the default “File” tab, click on toolbar item “Resize”. Then, change the “Resize By” option to be “Pixels”. Changing one of the settings, Horizontal or Vertical, will automatically change the other setting proportionally, unless you uncheck the checkbox named “Maintain aspect ratio”.
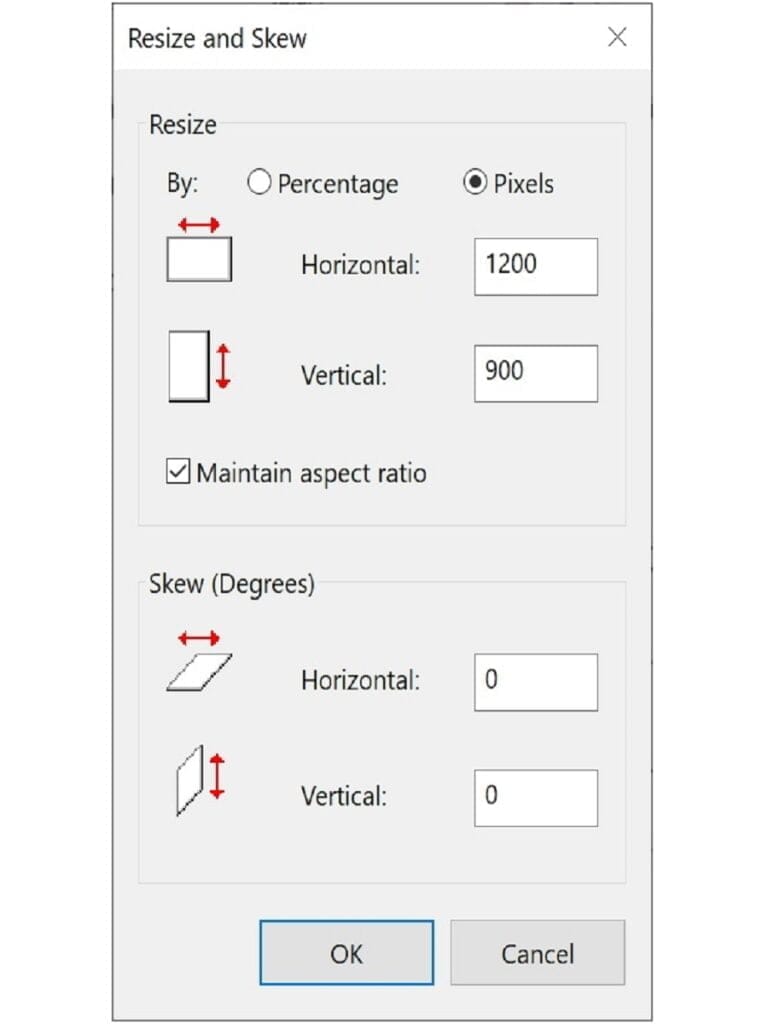
With experience, you’ll get a feel for how far off you can force a disproportionate image resizing. To get it right, sometimes you have to go back crop the original image differently, or take a new picture, or get a different image.
Resizing and Compressing with Free RIOT App
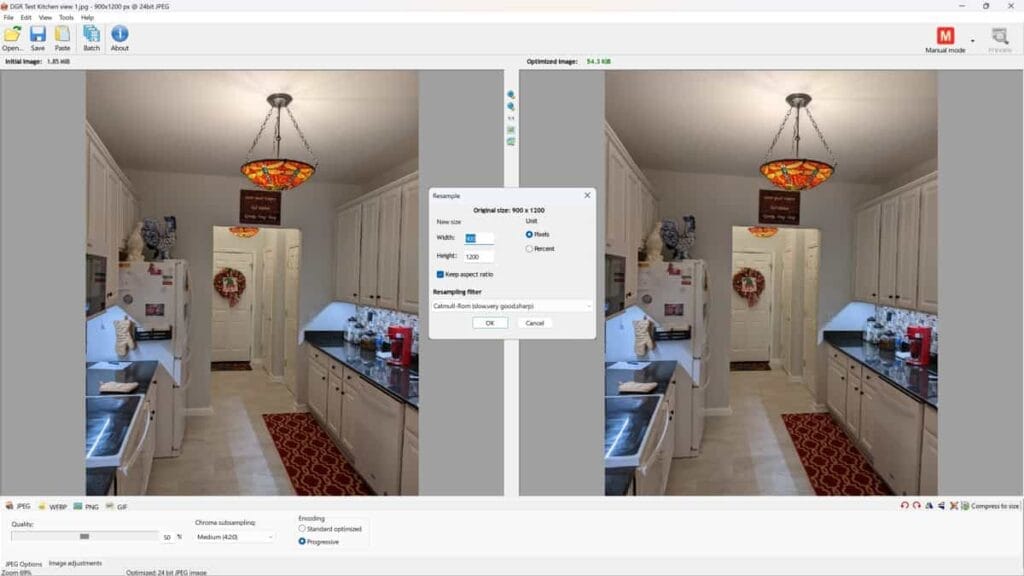
There is a free RIOT (Radical Image Optimization Tool) app for your desktop. It’s lightweight, and retains your settings for reuse each time. It offers a before and after pane for visual validation. Also, it does resizing as well. So, with this, I don’t need to use my basic resizing app from my operating system. Finally, it has tons of options you can set as well as a very handy drag-and-drop for an image. A wonderful feature is that it lets you save it to overwrite or rename the final, optimized image in the exact same directory. See the RIOT Download page for your options. It also includes RIOT plugins that work with IrfanView, XNView, GIMP, and more. Finally, it’s free for personal use; commercial use requires a small donation, which I happily did.
How to Delete a Media File Permanently
There are times when you will need to know how to delete a media file permanently from WordPress Media Library. And, depending on what theme, plugins, and settings you choose, there will be many options and features that may differ in your use of the WordPress Media Library. Deleting permanently is one of them. So, keep reading to see an example scenario of when you might need to know how to delete a media file permanently. Then, we’ll cover how to do it.
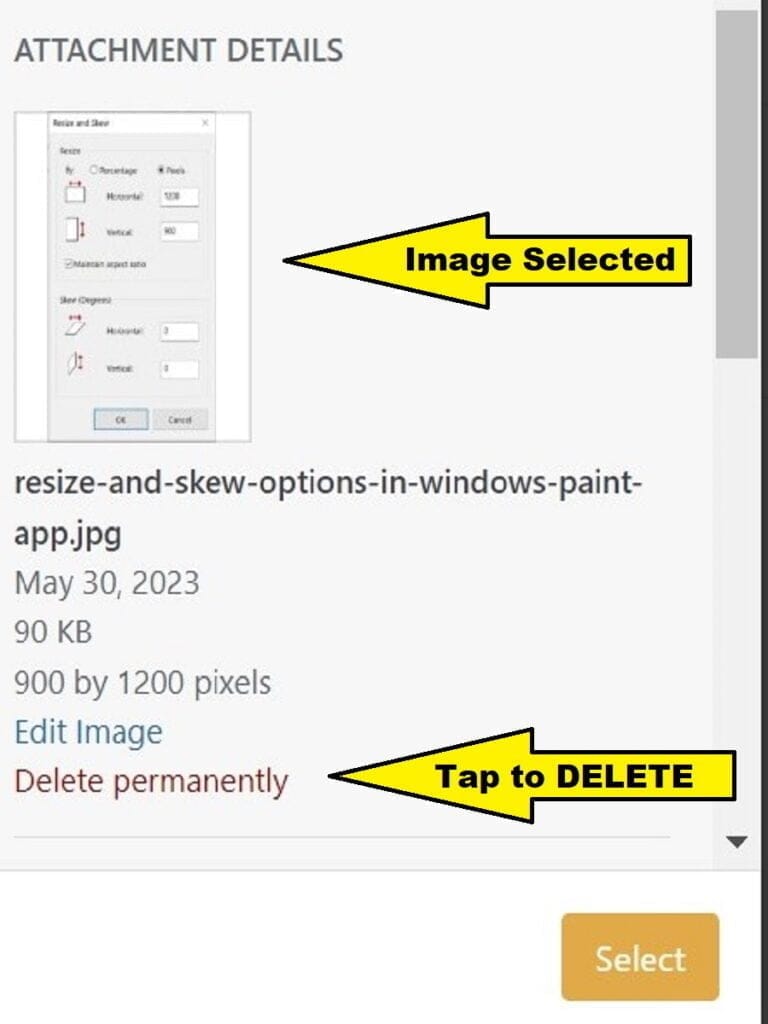
You might change the title of a post and so you want to change out the featured image with the name that matches the post title. So, you’ll want to delete the old featured image in order to keep from having excess images in your Media Library. So, you can bring up Media Library in any method you choose. It will bring it up, in our example, when you tap <Replace Image> in the Featured Image setting of your post. However, it doesn’t always automatically select an image so you’ll have to select it. Just confirm that whatever occurs, ensure it’s the selected image you want gone. Then, tap on the URL named like “Delete permanently” in the upper right corner section named like “ATTACHMENT DETAILS”.
Issue of Uploaded Image has Appended Extra Text in the File Name
An issue can occur of uploaded image has appended extra text in the file name. For example, when uploading an image file named “my featured image name.jpg” and it appends extra text onto the file name, e.g., “my-featured-image-name-1.jpg” is now the file name shown in Media Library. The hyphens were appropriately added between the words to replace empty spaces and is correct. However, the issue of appended extra text is shown as “-1” at the end of the uploaded file name. Why does that happen? Let’s see further.
There are multiple reasons for appending to the file name. First off, the image file with that file name already exists in Media Library. And, this is a compounded issue. If it’s already there, it might already be used elsewhere in a post or page. Locate the image file name in Media Library without the “… -1”. If it really already exists, you have these choices:
- Decide what other image name to use instead.
- Replace that other image with a different named one in that other post or page.
If that image isn’t attached to any posts or pages, you can delete it permanently, and then retry the upload of the desired image. But, what happens when deleting a media file permanently doesn’t work? In other words, you checked and you don’t see another image file existing with that name and it keeps thinking there is an image with that name already. Read on for a few options.
Solutions to Fix Failure to Delete a Media File Permanently
So, in this scenario you’ve already selected to delete a media file permanently. Then, you uploaded an image using that previous name, yet it still appends to the image’s file name after uploading its “replacement” image. So, here are some things you can try and they are given in order of attempts to fix your issue.
Caching is a big cause most of the time. But, we’ll also address later beyond caching issues. With all the plugins, servers, and settings, there are several types of caching and they are done in multiple locations.
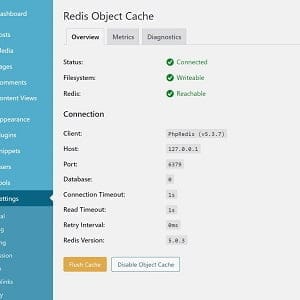
Solution Attempt 1: Ensure that you’ve emptied all caches first, followed by any database optimizations you may have available to you. Look for emptying object cache (like redis or memcache), any page or image caching, CDN caching (select all), and so on.
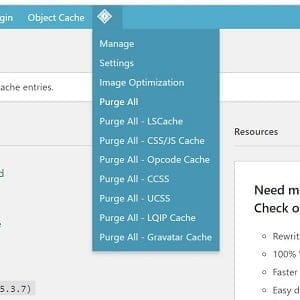
Solution Attempt 2: It’s a good practice to not have more than one caching plugin for images, by the way so, you can optionally test disabling them. For example, I use only one plugin for caching and that’s the LiteSpeed cache plugin. Other features on the theme or other plugins that have a caching option have been disabled.
Solution Attempt 3: You can try this MediaSync plugin, which will refresh the database to include image files that exist but a record of it is missing. If this reveals the image record in Media Library, you then will have an actual image to select in order to “Delete Permanently”. Whereas, before this, the image wasn’t appearing for you to remove.
Solution Attempt 4: If the issue still persists, you can try the following steps but ensure you have a database backup before you proceed as this is a very serious set of steps. Again, you’re proceeding at your own risk.
If the image does not appear visually in Media Library, then there is potentially an issue with the database not showing that image to you, which is a bug. In this example, the image (and its various sizes) still exists in the Media Library folder but the database record(s) used to make the image visually appear is/are gone. So, we ultimately wanted the database record(s) gone AND the image(s). For whatever reason, the database record references were deleted so, all we have remaining to fix this bug is to delete the actual image file. And, actually it will be several image files because it will be the original image file and also all its resized sizes of that original image will be there to be removed.
So, after backing up your database and image files, go to cPanel (or other interface for your site’s tools and resources) and open “File Manager”. If you don’t have this, or an option to view your files, you can try to use File Manager Pro plugin.
Drill down through folders via “public_html | wp-content | uploads”. Scroll down to the set of image files starting with that image file name. It will be slow to refresh file names as you scroll so you’ll need to have patience and repeat scrollings to get there.
When you get to the area of files you recognize the file names you need, select all the image sized file names you’ve confirmed are correct and delete them. During this process, use the option to skip the trash to delete them permanently. If you don’t select that option, you’ll still have the same issue of it appending text to the uploaded image file name. There should be one file for each image size that your WordPress system (and some plugins) is generating.
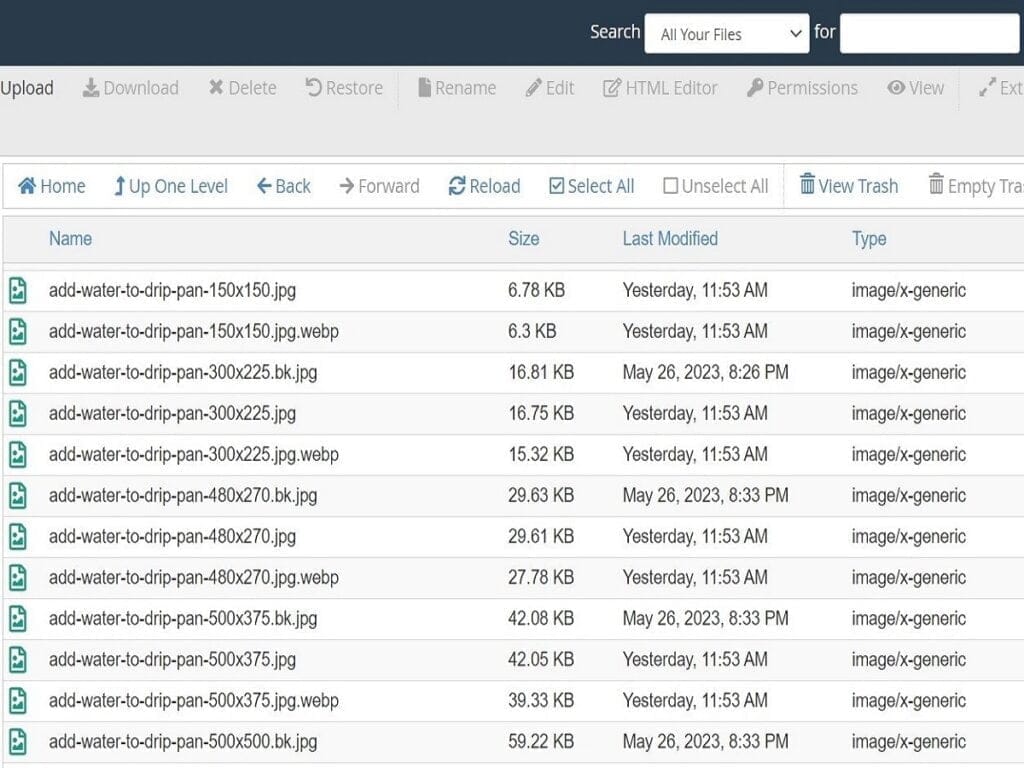
Then, close File Manager, followed by closing cPanel. In some cases, you might need to then perform a “database cleanup”. Then, try the upload again.
Notes of more cautions: If you are using any plugins that monitor physical image files in folders, this circumvents using their interface. So, those plugins might not be able to keep up with this backend change. I’ve noticed that real good plugins do have a way to refresh or reanalyze and can recover just fine and might do this automatically. So, it’s a good idea to conduct some reasonably good tests after this file deletion method and see if you’re okay with any of your imaging plugins reporting. If you notice an issue that you experienced, you have the option of restoring your image files from a backup that you made before these attempts.
Top WordPress Image Plugins
Here are some top WordPress image plugins and services recommended as good to use, depending on your current services and related plugins. These plugins vary in features.
- EWWW Image Optimizer (full set of features)
- Perfect Images (regenerate thumbnails, retina images, & lots more)
- Media Sync (refreshes images records in Media Library)
- WP Smush (compresses images and a little more)
- LiteSpeed Cache Plugin (full set of site and image performance)
Recommended Reading for WordPress Blog Image Sizing
Conclusion
Now you’ve been exposed to plenty of information on considerations for what sizes to use for your blog articles images, as well as site and logo images sizes. Plus, you have good references for other related resources such as the top image related plugins. Start your own image sizes quick chart and let me know what sizes you end up using. Share your discoveries and share this article!

