Here is a full step-by-step guide to file updated BOI Report online. All pics and steps shown in order. Loads of simple bullet points to better understand responses to make. A change to a previously submitted BOI Report example shown. Also see my posts on “How To File BOIR” and a frequently updated post “Is BOI Filing Still Required?“.
What Types of Changes Require to File Updated BOI Report?
An updated BOIR is required when there is a change with the reporting company or the beneficial owners from what was previously reported. These are changes like owners being added or deleted, a DBA name change (added or removed), address changes, closing business, and any other changes regarding what was previously reported.
My example of a changed BOI Report is representing a DBA name change.
Is Their a Deadline for Filing a Changed BOI Report?
Although this is subject to changing, it’s a 30 calendar days requirement after a reportable change has occurred.
Other Important Related BOI Report Guides
- How to File a BOIR
- Is BOI Filing Still Required? – Always see the latest requirement
1. Starting To File Updated BOI Report Online
Now, we’ll go through the various sections by following the wizard process of steps.
Start Here To File a Changed BOI Report Online
- When ready, visit FinCEN’s BOI E-Filing website: https://boiefiling.fincen.gov.
- After that, tap <File BOIR> to start.
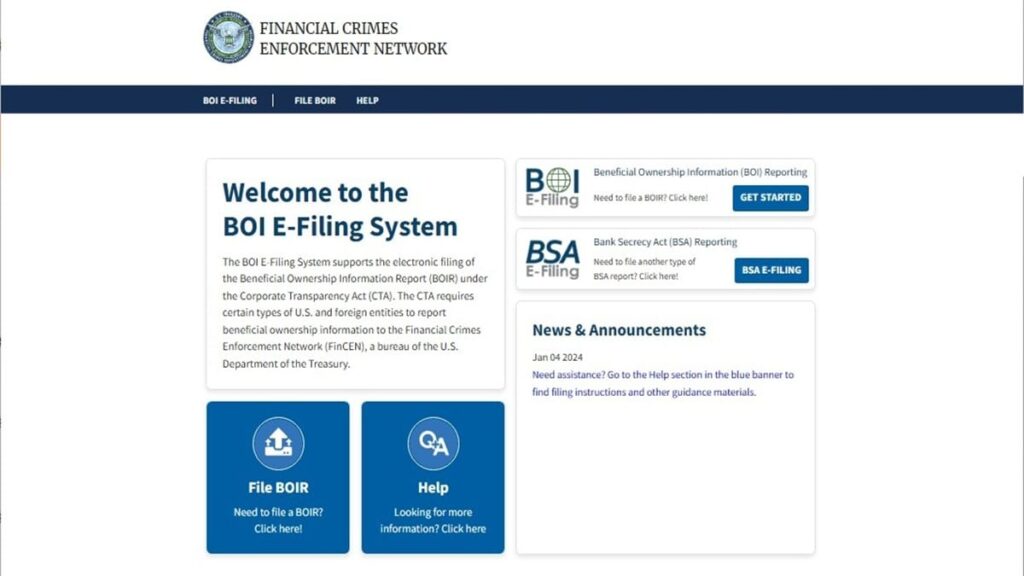
Go to FinCEN site. Tap <File BOIR>, even for just Updating a previous BOI Report.
Begin To File Online BOIR For Changes
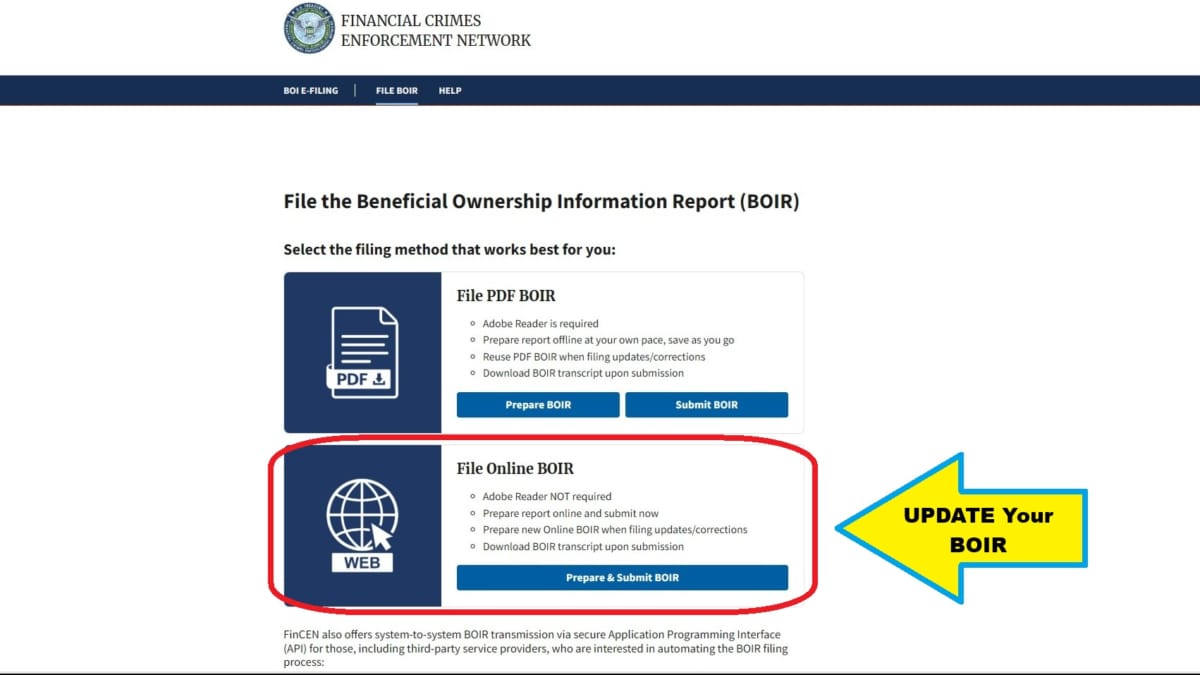
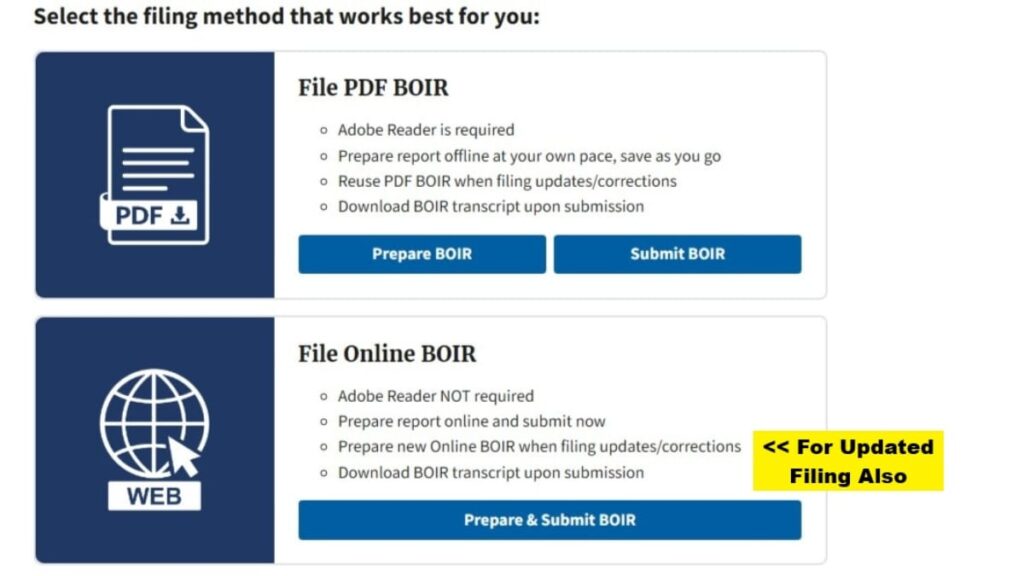
- Now, see section heading named “File Online BOIR”. At this time, in the “WEB” row, tap <Prepare & Submit BOIR>.
In the WEB section, tap <Prepare & Submit BOIR>. This is the same start for new and UPDATED filings.
2. Filing Information Tab
Reporting Company Associated with Latest Report
It states that this info is not applicable for an initial report. In other words, this refers to the most recent report, not the first one.
- Select the option to “Update prior report”. After that, the screen will change.
- Fill in the Legal Name box.
- Select the Tax Identification Type from the dropdown box. In my example, I’m selecting “EIN”.
- Then, in the Tax Identification number, enter in the EIN.
- The other items, even when noted as required, are grayed out and disabled.
- Tap <Next> to continue.
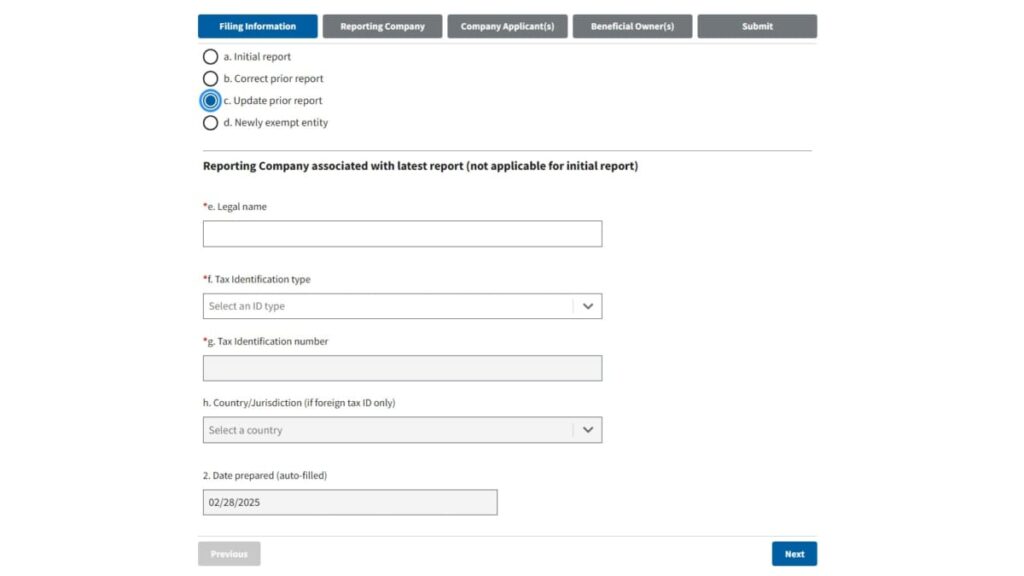
Select option to “Update prior report”. Then, populate 3 items and tap <Next>.
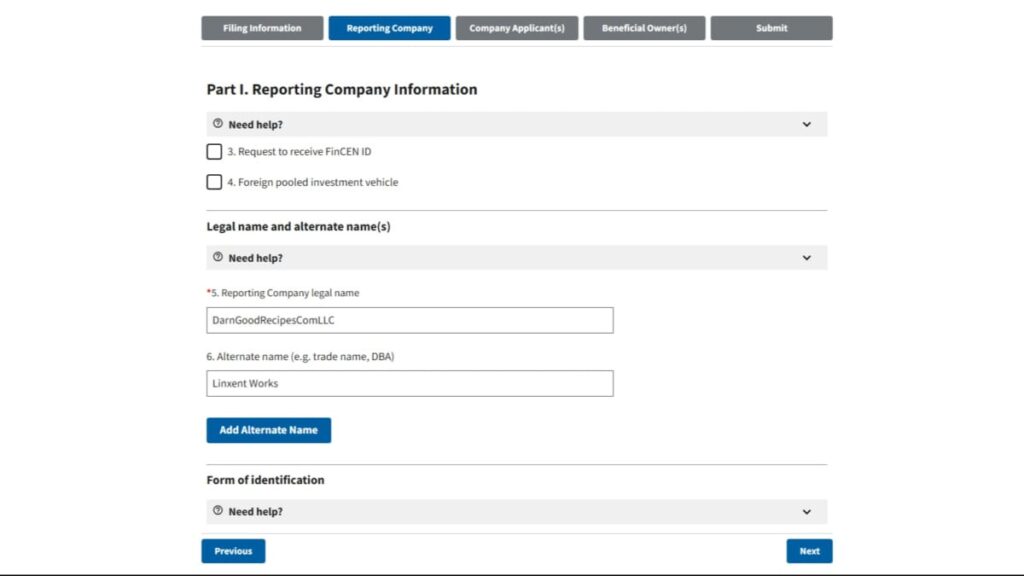
3. Reporting Company Tab
Legal Name and Alternate Name(s)
- Option to request to receive a FinCEN ID doesn’t get selected. That’s because this is an Updated Report for a previously submitted and certified report. In other words, we have a FinCEN ID already. However, if you don’t yet have a FinCEN ID then your situation is different.
- Fill in the Reporting Company Legal Name.
- Then, fill in any DBA name or trade name. If you have multiple names, tap <Add Alternate Name> to add more than one.
- Then, tap <Next>.
Fill in the Reporting Company Information. In my example, I’ve added a new, changed DBA name.
Form of Identification
- Select the Tax Identification Type from the dropdown box. In my example, I’m selecting “EIN”.
- Then, in the Tax Identification number, in my example, I enter in the EIN.
- The other items, even when noted as required, are grayed out and disabled.
- Tap <Next> to continue.
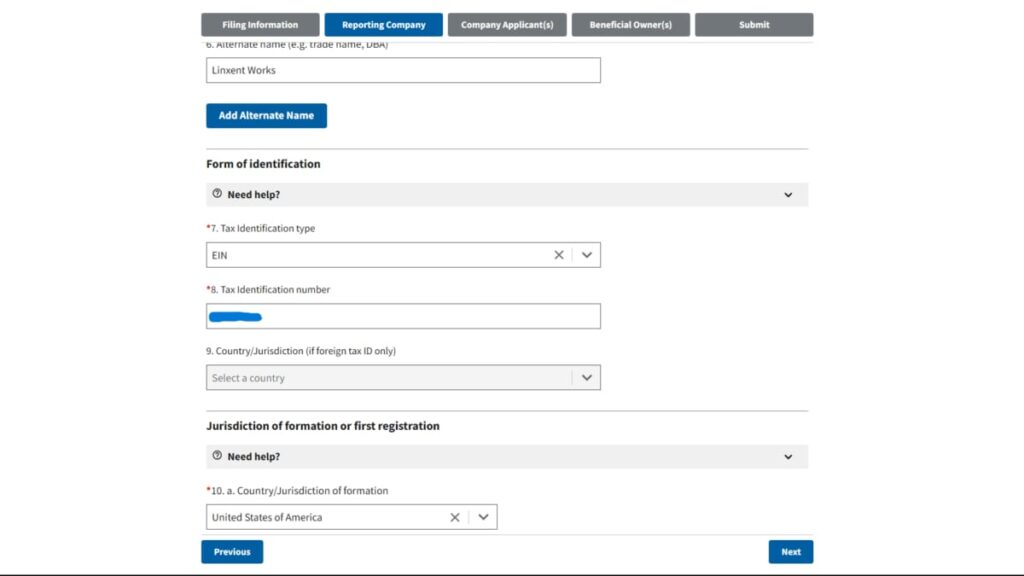
Populate Tax ID info items and tap <Next>.
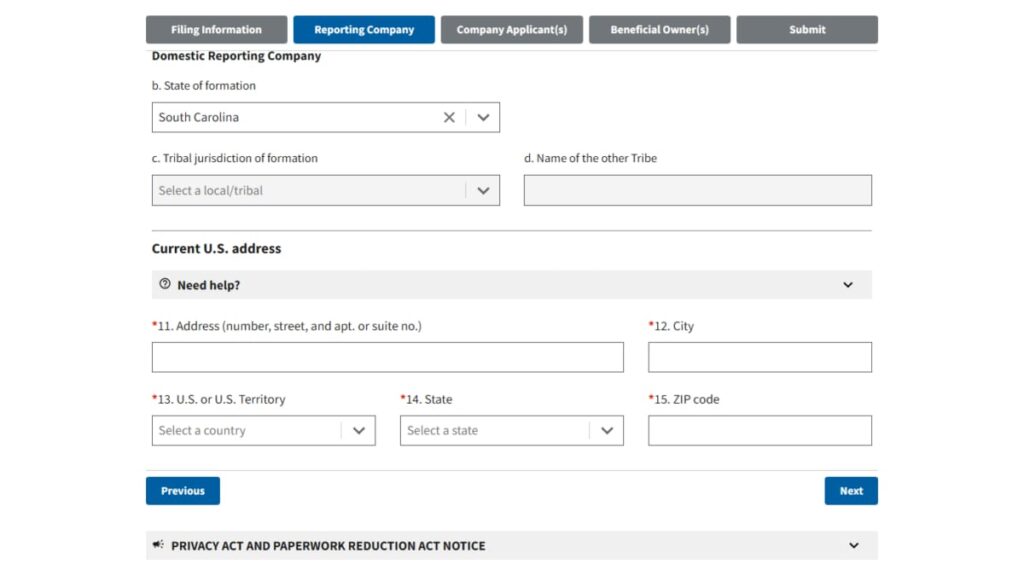
Domestic Reporting Company & Current U.S. Address
- Fill in the State of formation (for forming the company).
- Then, finish it out with the Company’s current U.S. Address.
- Tap <Next> to continue.
Fill in the State and the Company’s Current Address & tap <Next>.
Jurisdiction of Formation or First Registration
- Fill in the info regarding the first registration formation including the country, state, and current address.
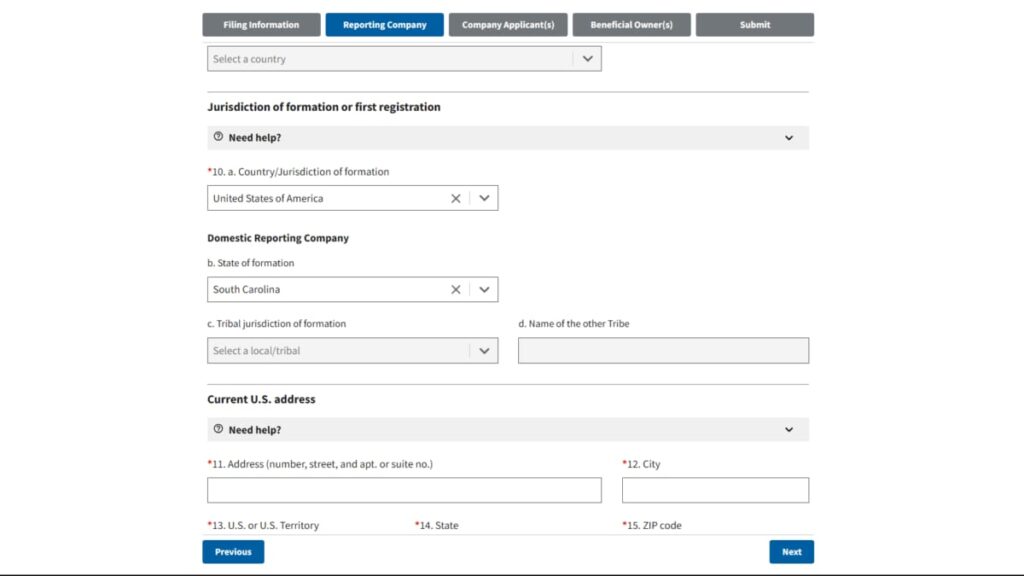
Populate the initial registration formation basic location info. Then, tap <Next>.
4. Company Applicant(s) Tab
Existing Reporting Company
In this example, my company was legally, fully created before January 1, 2024. So, I select the checkbox # 16. This ends any company applicant data being requested so, there’s no data to populate. It then gives a confirmation prompt which I accept. The form changes a bit. Then, tap <Next>.
Example of a company created before Jan. 1, 2024. Selecting checkbox 16 and then tapping <Next>.

5. Beneficial Owner(s) Tab
Beneficial Owner FinCEN ID
- Fill in the FinCEN ID
- Enter the Individual’s Last name or Entity’s Legal Name.
- Then, tap <Next>.
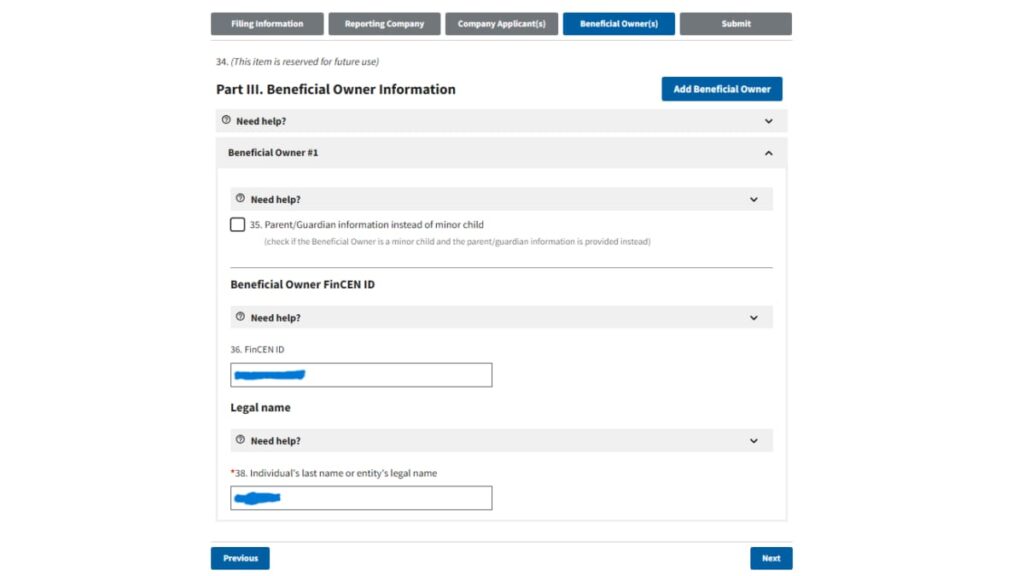
Fill in the FinCEN ID & Last Name (or Entity Legal Name). Then, tap <Next>.
6. Submit Tab
You’re done with reporting data entry! The final piece is to identify where you want the confirmation status sent to.
Then, you’ll need to tap <I agree> and the <I am human> Captcha item. If the Captcha responses fail, you’ll be given another picture to work with. Until it’s satisfied, the <Submit BOIR> button remains disabled.

After the Captcha item is confirmed verified, you can tap <Submit BOIR> and your updates will be submitted.

After the submission, if everything transpired fine, you’ll see a confirmation screen where you can download the transcripts report, filled with the data you submitted.

IMPORTANT: Don’t forget to tap to <Download Transcript>!

Finally, the confirmation status email will be sent to the email address you had submitted.

Conclusion
How to file updated BOI Report with FinCEN is easy and was shown step-by-step. You saw my example update filing for a DBA name change. And, you viewed the screen captured pics of each step, along with a list of what items to fill in. So, be sure to share this with others, as it’s very helpful.
3 comments
Roscoe
Hi there! I just wanted to ask if you ever have any trouble with hackers?
My last blog (wordpress) was hacked and I ended up losing months
of hard work due to no data backup. Do you have any methods
to protect against hackers?
Jeffrey Thomas Baygents
Hi Roscoe.
My last line of defense is full site backups and then I download them to keep them locally for full restore or partial restores incase part of the site was later discovered altered. We use WPvivid Pro as backups for automating. Also, we keep a second set of backups in the cloud at an undisclosed location. Regarding first line of defense, we follow some standard practices of firewall settings at the server level and then more at the individual website level. And, we don’t disclose things beyond that, which is another level of best practices. Fortunately, there are a lot of security resources available online. Hope that helps.
Alevras
Very interesting information!Perfect just what I was searching for!